# 이미 만든 커밋 메시지 수정하기

커밋 메시지를 작성했지만, 다시 수정을 하고 싶은 경우도 존재할 것 입니다.

만약 제가 <mark style="color:red;">`hello world를 추가하다`</mark> 의 메시지 제목을 작성하고 싶었는데, 오타를 확인하지 못해 <mark style="color:red;">`hello worlb를 추가하다`</mark> 라고 작성한 뒤 Push를 했다고 가정합시다.

가장 최근의 커밋 메시지를 수정하는 경우 <mark style="color:red;">`git commit --amend`</mark> 를 사용하여 수정할 수 있습니다.

{% hint style="info" %}
참고로 아래 내용은 모두 push를 했다고 가정한 상태에서 진행합니다. 그래서 강제 push를 하는게 필수적인데, add 상태에서 커밋 메시지를 수정하는 경우에는 강제 push를 진행하지 않아도 수정이 되는 것을 확인할 수 있습니다.

Staging Area 상태일 때, 강제 push가 필요하지 않은 이유는 push는 GitHub에 기록할 때 사용하는 것이기 때문입니다. 아직 기록이 되지 않았으면 강제 push를 할 필요도 없게 됩니다.
{% endhint %}

### 1. 가장 최근의 커밋 메시지 제목/본문 모두 수정하고 싶을 때

<mark style="color:red;">`git commit`</mark> 이 커밋 메시지의 제목/본문을 작성할 수 있다면 <mark style="color:red;">`git commit --amend`</mark> 도 마찬가지로 제목/본문을 수정할 수 있습니다.

한 번 직접 제목과 본문을 수정해봅시다.

<figure><img src="https://20790139-files.gitbook.io/~/files/v0/b/gitbook-x-prod.appspot.com/o/spaces%2FnSAcCjqo8c2TeImkEAwZ%2Fuploads%2FfeQixY39YniLVLZarPV9%2Fimage.png?alt=media&#x26;token=0abb6aa8-e120-47bd-abe8-69429328e631" alt=""><figcaption></figcaption></figure>

일단 저는 위에 가정했던 것과 똑같은 커밋 메시지를 작성했습니다.
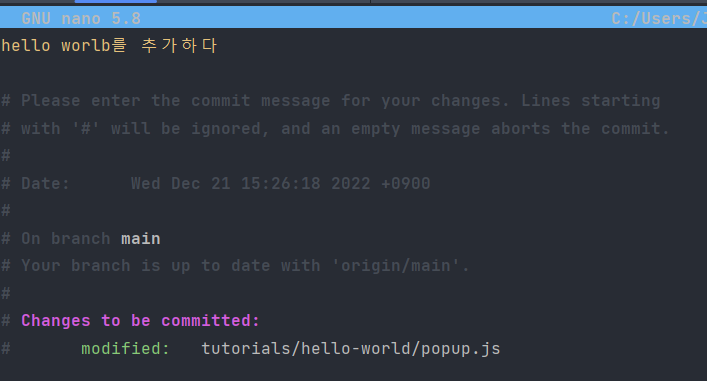
이제 <mark style="color:red;">`git commit --amend`</mark> 를 입력해봅시다.

<figure><img src="https://20790139-files.gitbook.io/~/files/v0/b/gitbook-x-prod.appspot.com/o/spaces%2FnSAcCjqo8c2TeImkEAwZ%2Fuploads%2FZfQl56HbgKSefIcvXjWr%2Fimage.png?alt=media&#x26;token=67a20cdc-15e7-48eb-985b-b57bcf166db5" alt=""><figcaption></figcaption></figure>

이렇게 커밋 제목과 주석처리 된 내용이 나오게 됩니다.
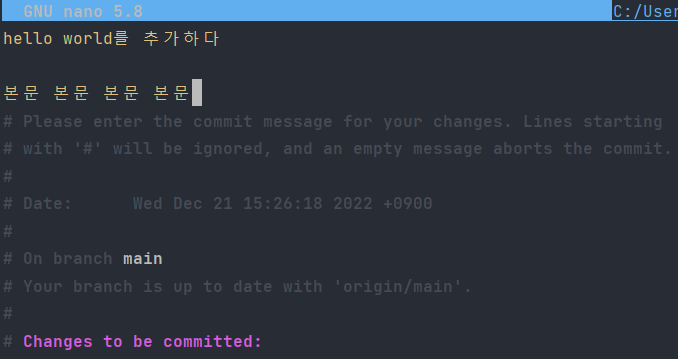
이걸 올바르게 설정해봅시다.

<figure><img src="https://20790139-files.gitbook.io/~/files/v0/b/gitbook-x-prod.appspot.com/o/spaces%2FnSAcCjqo8c2TeImkEAwZ%2Fuploads%2F8ame5lquYo4DByH8UUzH%2Fimage.png?alt=media&#x26;token=8c953f94-7e1c-41b6-b103-e17456f7dd57" alt=""><figcaption></figcaption></figure>

다 작성했으면 nano 에디터 기준으로 Ctrl + O, Ctrl + X를 입력하면 됩니다.

이후 커밋 메시지를 강제 push를 해야 하므로 <mark style="color:red;">`git push -f`</mark> 를 사용합니다.

<figure><img src="https://20790139-files.gitbook.io/~/files/v0/b/gitbook-x-prod.appspot.com/o/spaces%2FnSAcCjqo8c2TeImkEAwZ%2Fuploads%2F06IVBTSlLznDhWu5FoaJ%2Fimage.png?alt=media&#x26;token=31298950-bdb7-432d-a633-103756086e50" alt=""><figcaption></figcaption></figure>

커밋 메시지 목록을 확인해보면 수정한 대로 적용된 것을 확인할 수 있습니다.

### 2. 커밋 메시지 제목만 수정할 때

위의 상황처럼 굳이 본문을 수정하지 않고, 제목만 수정해도 문제 없는 커밋 메시지들이 있습니다.

이런 경우에는 <mark style="color:red;">`git commit --amend -m "수정 내용"`</mark> 으로 평소 커밋 메시지를 작성하는 것에 <mark style="color:red;">`--amend`</mark> 옵션만 추가하면 됩니다.

참고로 <mark style="color:red;">`--amend -m`</mark> 순서로 입력해야 하는 점을 주의하시길 바랍니다.

<figure><img src="https://20790139-files.gitbook.io/~/files/v0/b/gitbook-x-prod.appspot.com/o/spaces%2FnSAcCjqo8c2TeImkEAwZ%2Fuploads%2FumiJ7E3nFfa9UWGA6re0%2Fimage.png?alt=media&#x26;token=53283186-2d99-4049-b13f-75cfb3b2bd66" alt=""><figcaption></figcaption></figure>

이렇게 다시 hello worlb를 추가하다라는 메시지가 있을 때, <mark style="color:red;">`git commit --amend -m "hello world를 추가하다"`</mark> 를 작성하고, <mark style="color:red;">`git push -f`</mark> 를 통해 강제 push를 진행합니다.

<figure><img src="https://20790139-files.gitbook.io/~/files/v0/b/gitbook-x-prod.appspot.com/o/spaces%2FnSAcCjqo8c2TeImkEAwZ%2Fuploads%2FinQTEGXfPtkMPyB5o4mu%2Fimage.png?alt=media&#x26;token=2daed23d-776e-44d5-bf2b-3be1d4ae3f57" alt=""><figcaption></figcaption></figure>

다시 확인해보면 제대로 커밋 메시지 제목이 수정된 것을 확인할 수 있습니다.

### 3. 커밋 메시지를 수정하지 않을 때

이 경우에는 코드만 수정하고, 커밋 메시지는 건들지 않을 때 사용하는 방법입니다.

<mark style="color:red;">`git commit --amend --no-edit`</mark> 으로 커밋 메시지 내용을 수정하지 않은 채 커밋 메시지를 새로 만든다는 의미입니다.

코드만 수정하는 경우엔 다음 장에서 배울 <mark style="color:red;">`git reset --soft`</mark>, <mark style="color:red;">`git reset --hard`</mark> 를 통해 코드를 수정한 뒤, <mark style="color:red;">`git commit --amend --no-edit`</mark> 을 입력하고, <mark style="color:red;">`git push -f`</mark> 를 수행하면 됩니다.

참고로 <mark style="color:red;">`git commit --amend`</mark> 를 한 뒤, Ctrl + O, Ctrl + X를 해도 상관 없으며, <mark style="color:red;">`git commit --amend "최근 커밋 제목 그대로 작성"`</mark> 으로 설정하는 것과 같습니다.

{% hint style="warning" %}
가장 최근의 커밋 메시지를 수정하는 것 뿐만 아니라 중간에 있는 커밋 메시지를 수정하는 방법도 존재합니다. 이 경우 git rebase에 대해 알아야 하는데, rebase를 사용하여 활용할 수 있는 방법이 여러가지이기 때문에 여기에서 다루지 않습니다.
{% endhint %}
